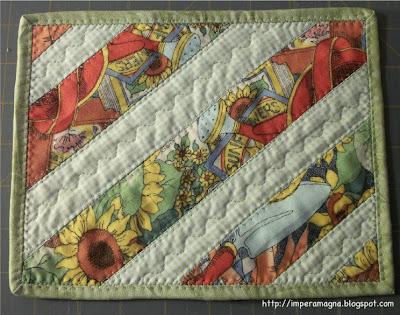
Saturday, April 30, 2011

Thoughts on a Saturday Morning


After I make a run to the farmers market for local strawberries and whatever else looks good, I think I need to stop finding a zillion other things to do rather than pin basting this flimsy.  

Do you see any pins in the fabric?  Neither do I...   *tsk tsk*   Bad me!


~ ~ ~ ~ ~

I'm glad I began blogging if for no other reason (see above) than the kind people I've met virtually...   like Cathy from Big Lake Quilter who brightened my Friday when I found a squishy in the mail when I came home from work.  

Not only a lovely, personalized card... but the perfect little bag to carry my needle book and a small project to work on. 


Thank you, Cathy!

~ ~ ~ ~ ~

Finally, there has been some discussion in these parts about why we should be so fascinated about a royal wedding across the big pond.  Well, I think that... whether we believe in fairy tales or not...  we would all like to believe in "...happily ever after."

My best wishes to the Duke and Duchess of Cambridge!

Friday, April 29, 2011

Pinwheels (part 2)

The pinwheels are fun to make...  if I made a couple each evening, I foresee a baby quilt happening...


...a good thing a couple of my "daughters" (former members of my Girl Scout troop) are expecting.  Just hope one of them has a girl...   *lol*

Sooooo glad it's Le Weekend!


Thursday, April 28, 2011

Pinwheels

One of my favorite tutorial sites to learn quilting techniques and get quilt ideas is the Missouri Star Quilt Company on YouTube.  I've been wanting to try their Fast and Easy Pinwheels!!! method... so last night, I did!


There has been some concern online about the bias edges but I didn't have a lot of problem with that... the photo reveals where a bias edge is not already in a seam, it tends to draw up a little.  However, I think once all the blocks are made and sewn together with an added border... that everything will be even...

Oh... and I want to point out that the points of the pinwheels don't match exactly... but you know something?  I'm hoping this quilt will be so loved and used that it won't matter one little bit if it's not perfect!


~ ~ ~ ~ ~

Wouldn't you know it... the first number drawn was a "no reply" blogger who didn't leave her email address in her post.... so I had to draw another number.   


Drum roll please....   and the winner of the wonky star mug rug / mat is.....


30. Alycia said...      
 
    Sounds like a great time for a give-away! Love that mug rug!!


I've emailed Alycia and am awaiting her reply... thanks to all who entered the give-away... and thanks for making blogging so much fun!

Wednesday, April 27, 2011

How to Make a Needle Book: A Tutorial


To make your very own needle book, you will need the following:
  
  • 2 – 4.5” x 5.5” pieces of fabric
  • 1 – 4.5” x 5.5” piece of batting
  • 2 – 2.5” x 4.5” pieces of fabric
  • 2 – 2.5” x 3” pieces of fabric
  • 22” of 1.5” wide fabric strip (binding)
  • 2 – 1” x 5.5” strips of fabric
  • Ponytail holder / covered elastic thingy / hair do-lolly
  • Button (one with a shank will work best)
  • 12” of narrow ribbon


Fold lining fabric in half and press to crease.  Make a “sandwich” out of the 2 4.5”x5.5” fabric pieces and the batting with the batting in the center.  The crease will be your sewing line.

Sew across the center of the sandwich from one 5.5” side to the other.  (Can you see the crease / sewing line?) This will make the “fold” in the “book” neater.


Right sides together, sew the two 2.5”x3” fabric pieces together on one short end, press, turn, and press again so that the wrong sides are together.  Stitch across the seam end appx ¼” from the edge.    


(Note: I line the little pocket with batik fabric, which is tightly woven, to keep the very sharp, pointed scissors from poking through the looser weave top fabric.)


Trim edges... as you can see, I wasn't careful when cutting out the little squares.

Take one of the 2.5”x4.5” pieces of fabric and lay the smaller sewn block on top, matching edges.  Sew one of the 1”x5” strips to the right edge of the pocket side, press, turn and top stitch.  


Cover the edge the other 2.5” x 4.5” piece of fabric with the remaining 1” x 5” strip, press, turn and top stitch.

With the inside of the needle book up, place the two pockets on  each side, lining up the top and outside edges; pin.


Select the ponytail holder you wish to use and pin it in the middle of one 4.5” side of the needle book.


Using the 22” strip of 1.5” wide fabric, bind the needle book, catching all raw edges and the ponytail holder. 


Reinforce ponytail holder/closure by stitching over it several times, then cut the end of the ponytail holder that will be on the inside.  Turn binding, press, and top stitch down.

Use a pin to mark where to sew the button; sew on the button with the knot on the inside of the inner pocket.


Place scissors in the inside pocket, mark where to sew the ribbon; tack ribbon down, leaving the inner pocket open.


 Et voila!


If you have any questions, please feel free to ask...  I took 25-26 photos but didn't post them all.


Tuesday, April 26, 2011

Needle Books


I never heard of a "needle book" was until I came across one on Bonnie Hunter's site in January...


What a cool thing to carry with you to hold small scissors and a few pins and needles... unlike the bulky ziploc bag I carry with all my sewing supplies!  So, I decided to make one, raiding my scrap bins for the materials... 


The inside...


There are pockets behind the scissors pouch and the needle/pin fabric so you can wind thread on a card to slide behind the scissors... or even slide in a wound bobbin.  The ribbon holds the scissors in place.

Now... I think I'm going to make another one...


Monday, April 25, 2011

Guess What?

Sometime over the weekend, this blog went over both 5,000 page views AND 50 followers!  How fun....  and I thought it was a reason to celebrate with a give-away for a wonky star mug rug / candle mat / whatever made by yours truly!


To enter the give-away, leave a comment and let me know that you would like to give this wonky star thing a good home.

No, you don't have to follow this blog, go to any other sites and post/follow, post on FaceBook, or tweet about it.  Just tell me that you like my wonky star...

Thanks to all who have made blogging such fun!


Fine Print:  Give-away ends on Wednesday, April 27th at whatever time I get home from work, get to the computer, count the number of entries, and do the Random number thing.  I will email the winner for her/his address and hope to put the mat in the mail on Friday.
  • If you are a "no-reply" blogger, you must give your email in your post or I will have to draw another number.  If I have no way to contact you, I can't send you the mat.
  • If you live somewhere other than the US, you are more than welcome to enter as well!

Saturday, April 23, 2011

Friday, April 22, 2011

Return of the Mug Rug

Every time I walk past the dining room table with the unpinned quilt sandwich, I realize just how large it is... and how long it's going to take me to quilt.

How do I handle this type of situation?  Why, of course... task avoidance!   *lol*

So I made a mug rug... 


...so MUCH quicker....

Thursday, April 21, 2011

KF Sandwich

The backing is sewn together and the quilt sandwich is made.  A lot of smoothing needs to go on but I'll work on that each time I walk by.  There was a bit of natural light available so I thought I'd take another couple of photos...


~ ~ ~ ~ ~

I won another give-away!  Am I lucky or am I lucky!

Amy of Interlocking Squares is spring cleaning and decluttering and offered four Schnibbles quilt patterns by Miss Rosie's Quilt Co....  and I won the "Imagine" pattern!


The pattern is charm pack-friendly and finishes at 37"x37"...  I'm already thinking about fabrics and colors!

~ ~ ~ ~ ~


I'm on the email list for an online quilt fabric emporium and I received notification of a fabric line that will be released in September 2011....

"Terrain" by Kate Spain for Moda Fabrics


I love... with a capital "L"... Love the colors!!!  However, the yardage will be $10.75...  and the jelly roll will be $39.00...   
*sigh*


Wednesday, April 20, 2011

A (semi) Finish

I got a little play time in after work yesterday and completed the KF HST quilt top.


Not the best photo...  natural light at 8:00 at night is fairly scarce... but you can get the general idea...


Tuesday, April 19, 2011

All Work and No Play...

Too bad that work and sleep get in the way of play...


...but some play was squeezed in yesterday!

Monday, April 18, 2011

Quilter's ADHD Strikes Again


The giant mug rug/table topper looks so nice beside the bed that I eyed the bedside table on the other side when changing the linens.  I measured the oval top and have some leftover (or orphan) blocks from the double 4-patch left that will work well for this project.


What distracted me was the bedside table... or the Martha Washington-style sewing cabinet that serves as a bedside table.

There's something about sewing cabinets... not sure what it is other than someone I knew used the cabinet to store her sewing stuff back before there were decent closets and storage drawers, baskets, bins, etc.

This one has glass pulls... I love glass pulls...


I have a similar sewing cabinet in the guest room being used as a bedside table as well.


I was surprised that no one in the family wanted my grandmother's sewing box... so its been living with me.  It is simpler and was handy to carry from its place by her chair in the living room to the front porch so she could sew/tat/crochet while visiting.


This cabinet has a little sliding thread tray...


...which is removable.  I can see where my grandfather repaired the sewing cabinet when it got wobbly...

Underneath, is a ziploc bag where I put all my grandmother's sewing supplies so they would stay together.


Once seeing the bag, I needed to explore it again because it's been quite a while...


Buttons, hook-n-eyes, snaps, a paper measuring tape, and a cloth belt...

...a round plastic zipper box (anyone else remember these?), empty but being used to store rolled up double-faced satin ribbon...


...sewing machine needles...


...something that looks suspiciously like the bias tape makers


...Clark's (before Coats came along) crochet cotton...


...more thread, buttons, a seashell, a packet with hinges (handwriting is my grandmother's)... the little green thing is a cork that my grandmother used to hold her sewing needles... not sure what the wooden thing is with notches but I suspect it was used to hold thread...


...another cork with a pin, the rhinestones are strung on thread, a bolt of lace...


.. a tatted medallion and a crocheted one, both made by my grandmother...


...and a few items every thrifty woman kept on hand.   After examining everything, I put it all back...  I'm just not able to discard these things...   

My parents were children during the Depression and my grandparents reared families during those dark days.  I heard a lot of "make do or do without" growing up... guess it stuck.
 

I did finish one project yesterday... if you remember, I had four of the flower blocks left... so I made a mug rug with the last one...


...don't want even one block going to waste!